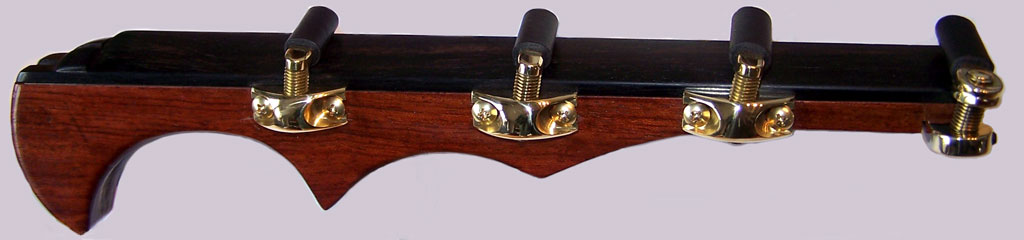
Capo:
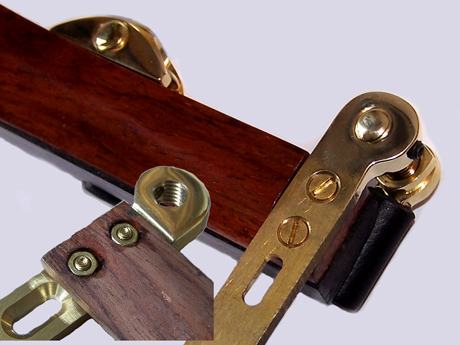
For a proper fit, the side of the extension must provide a flat area in the mounting position 1-1/4" long by 1/2" high (32x13mm) high. Once the proper position for the yoke is determined, drill the pilot holes, spaced 15/16" (24mm) apart. Adjust the number of turns of the arm into the yoke until it looks like the right height, and attach to the extension. See where it closes, and adjust as necessary.
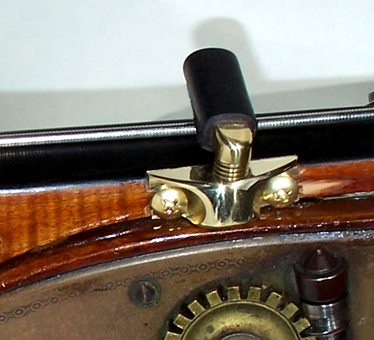
The supplied screws are # 6 gold-plated stainless steel. They are spec'd for strength, and the geometry allows for maximum adjustability. Use of other screws is discouraged. Please use a fresh, high quality, #2 Phillips driver. Other types such as Pozidrive will strip the screw head and make for headaches and some interesting curses. So please be careful during this procedure!
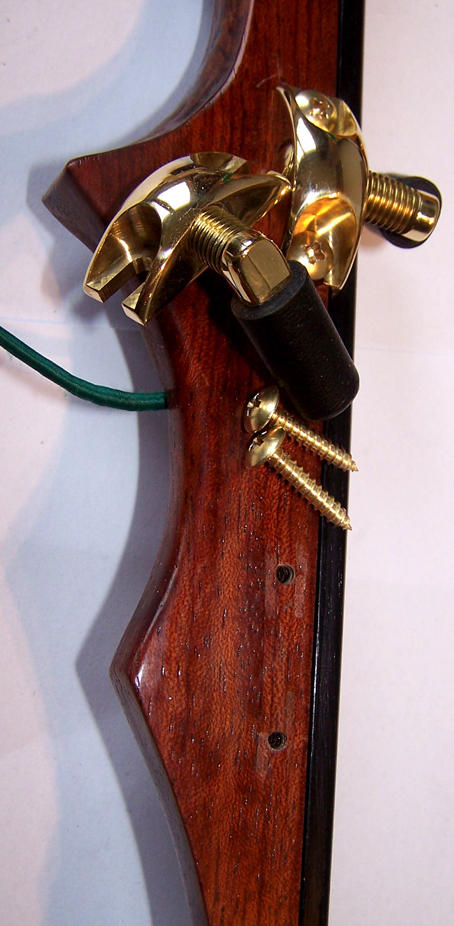
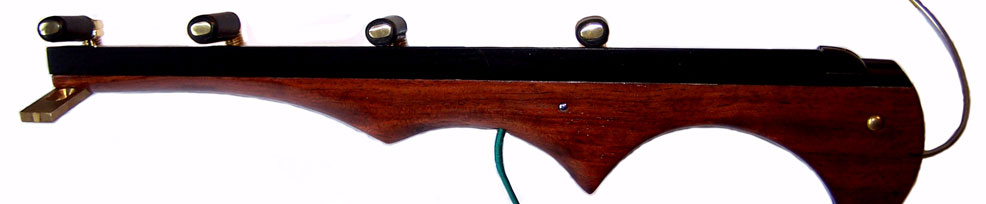
When installing a Capo or E-Stop it is sometimes necessary to cut the threaded stud to length. All parts are made from free machining brass, and can easily be cut/ground/sanded/polished to fit a particular installation. Besides the stud, there are also instances when the yoke itself must be altered. Some extensions are too thin under the Eb to accommodate the full footprint. The yoke contains enough bulk that it can be ground substantially and still retain adequate strength.
The standard Capo and E-Stop arms fit extensions that measure up to 3/4" (19mm) from the mounting surface to the string center. If you have an unusually wide extension, let me know, and I can ship longer fingers.
Be aware that the threaded hole in the yoke is angled in two axes. The stud must exit the hole angled away from the string. Capos are shipped with the arms already threaded into the yokes. If you remove them for cutting, be sure to put them back the same way. If you do remove them completely, they may turn too freely when reassembled. Contact me for instructions on how to fix this.
Another issue is the angle of the Capo finger over the extension surface. Some installers fret if they see that it does not lie tangentially over the extension fingerboard. In other words, the finger appears to have too little rake. This is intentional, as the reduced angle decreases string deflection when closing the Capo. In cases of extreme fingerboard radius where the finger would contact the wood before full closure, a rake can be ground into the foot of the Capo yoke. There is enough bulk there to allow for a cut of up to about 10°. For the E-Stop finger, it can simply be bent in a vise to increase the rake. Do not try to bend a Capo finger however.

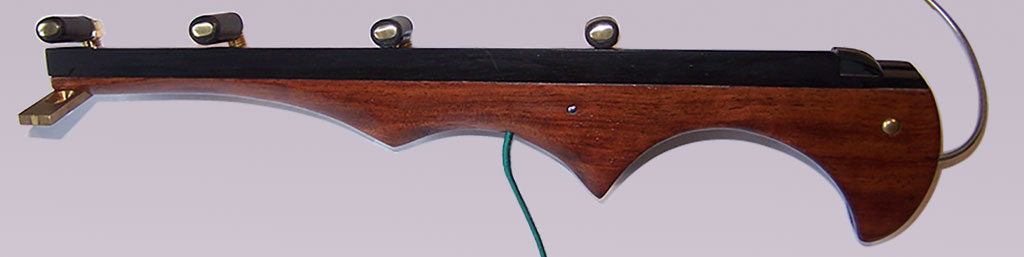
E-Stop:
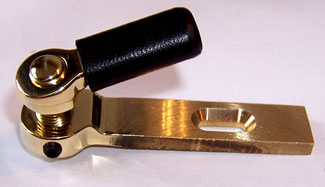
The E-stop has a 1/2" wide x 0.15" thick (13x4mm) tang which is intended to be screwed into the neck under the nut. The remaining nut must of course be notched to fit over the tang. Most installers also add an additional countersunk hole in the tang, besides implementing the countersunk slot.
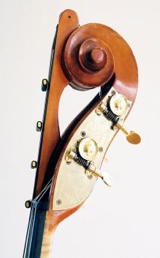
I recommend placement where the center of the arm-shaft hole is 13/16" (21mm) away from the center of the E-string. The final working distance will vary with the installation, and the workable range is wide. If your pegbox or extension is unusually wide and you think this distance will be 1" (25mm) or more, be sure to ask for a long finger.
The rotational resistance for the Capo is "set at the factory" if you will. For the E-Stop it can be adjusted by the player via a set screw using a supplied hex key.
Not all installers do this, but the E-Stop can be used as a mounting point for the extension body.
Some installers cut down the tang at the end of the extension to avoid the need for notching the nut. I do not endorse this, but no problems seem to have resulted.
Since the E-Stop bracket has no U-channels like the Capo, it is less adjustable. Adjustments can be made by increasing or decreasing number of threads showing, but the height change will be in 1mm increments. Therefore it is advised to set up the bass first using only a screw in the slot. Adjust in and out to set intonation, and only then drill for the second mounting screw. Once installed, you can also make fine adjustments by bending the finger or filing down the leather wrap.
One other note: Some installers have informed me that operation is better if the finger is set to close a few degrees less than perpendicular to the string – pointing slightly up.
Also, a few customers have chosen to use my mounts, but make their own wooden fingers. For this I can ship yokes or E-Stop plates with lengths of plain threaded stud instead of finished arms.

Warranty:
- Uninstalled units can be returned for full refund within six months.
- Installed units can be returned within 3 months if found unsatisfactory for any reason.
- In the case of any failure that is agreed to be the result of a manufacturing defect, parts will be repaired replaced at no charge within 10 years of purchase.